
Pure Ingredients, Perfect Texture: What You Need to Make Soft Homemade Tofu
To make soft, luscious homemade tofu—the kind that practically melts on your tongue—you need only a few ingredients. But not just any ingredients. At Claudia’s Concept, every component we recommend supports your body’s natural balance and vitality. Let’s go through what you’ll need to achieve creamy, delicately set tofu at home, with all the right texture and none of the additives you’d rather avoid.
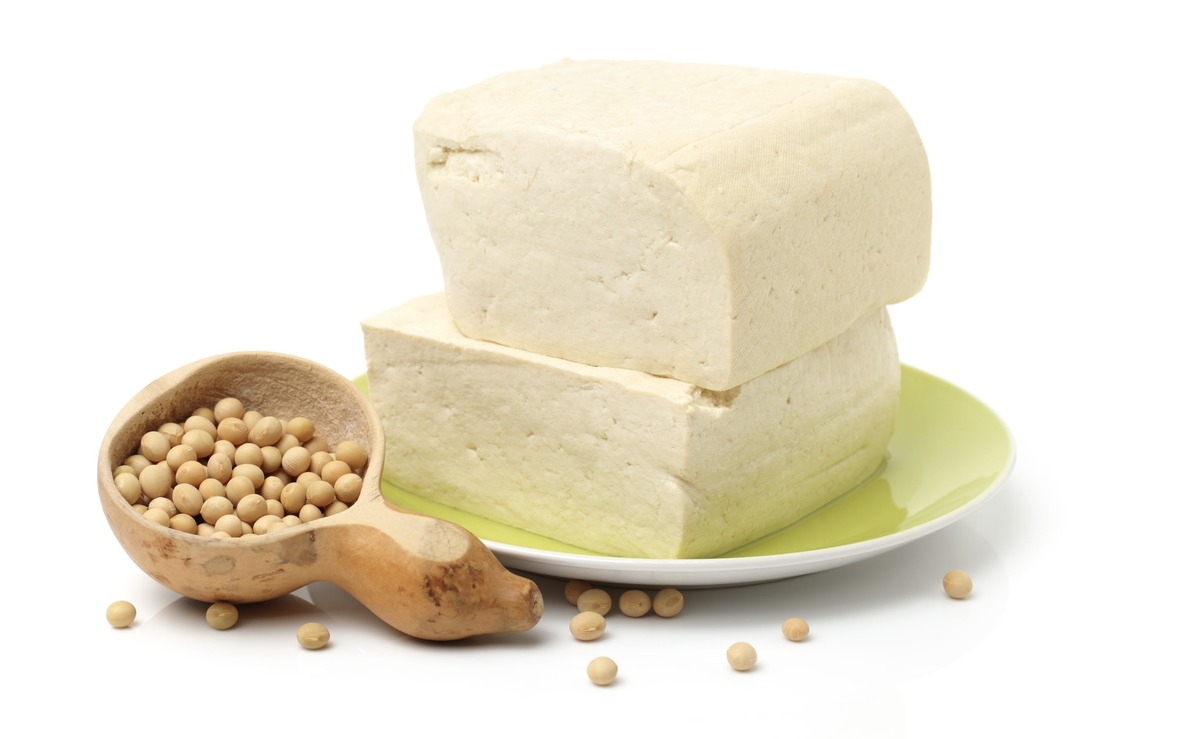
Essential Ingredients for Soft Homemade Tofu
Beautiful tofu starts here—with thoughtful sourcing and mindful preparation. When your base ingredients are clean, simple, and intentional, every bite reflects it. Ready to explore which coagulant will give you that dreamy silken texture? Let’s dive into the next step together.
Types of Coagulants: Choosing the Right One for Soft Tofu
When it comes to mastering the art of soft, silky homemade tofu, the choice of coagulant makes all the difference. If you’ve already soaked, blended, and strained your soybeans, this is the moment where science steps in to turn your creamy soy milk into that luscious, custard-like tofu. At Claudia’s Concept, selecting the right coagulant isn’t just about flavor—it’s also about nutritional value, texture, and tradition. Let’s walk through your main options, and how each one influences the final product.
Nigari (Magnesium Chloride): The Delicate Artist
This is the traditional Japanese choice for alluringly soft tofu. Nigari is a byproduct of seawater, and its magic lies in its gentle curdling action. It gives tofu that incredibly smooth, almost silky texture that melts in the mouth. You can find Nigari in liquid or crystalline form, and it’s especially favored for making kinugoshidofu (silken tofu).
- Texture: Very soft, jelly-like consistency
- Taste: Mild, pure bean-forward flavor without any sourness
- Nutritional Note: Supplies a natural form of magnesium, which plays a vital role in muscle and nerve function
Magnesium chloride works quickly, so timing and stirring techniques are crucial. With Nigari, less is often more. For 1 liter of soy milk, start with 1.5 to 2 grams and adjust as needed.
Gypsum (Calcium Sulfate): The Bone-Loving Mineral
In many Chinese kitchens, gypsum takes center stage. It’s an excellent choice if you’re aiming for a tofu that’s soft but holds its shape slightly better than Nigari-based varieties. Gypsum adds subtle density, making it ideal for spoonable tofu puddings or dishes where tofu is crumbled.
- Texture: Soft, slightly grainier than Nigari tofu, good for spooning
- Taste: Neutral, slightly mineral if overused
- Nutritional Note: High in bioavailable calcium—contributes meaningfully to daily calcium intake
Calcium sulfate enhances tofu’s nutritional profile more effectively than other coagulants. In fact, according to the USDA, gypsum-set tofu can contain up to 350 mg of calcium per 100g serving. That’s a substantial boost for bone health, particularly valuable in plant-based diets promoted at Claudia’s Concept.
Lemon Juice or Vinegar: The Easy Pantry Shortcut
If you’re just starting out or experimenting with tofu for the first time, lemon juice or vinegar might be your go-to. These acidic coagulants are accessible and intuitive—just pour and stir. While they create a softer set, the results tend to be less smooth than mineral-based coagulants. There’s also a touch of tartness in the end product.
- Texture: Soft but slightly crumbly, less uniform curds
- Taste: Noticeably tangy, can complement savory dishes
- Availability: Ideal if you’re working with what you have
Use 1 to 2 tablespoons of lemon juice or white vinegar per liter of soy milk. Pour it in warm, not boiling soy milk, stir gently, and let it rest undisturbed. The experience is part of the joy!
Indian Approach: Whey from Yogurt (Dahi ka Pani)
Used for centuries in Indian kitchens, the liquid whey drained from homemade curd (dahi) is a gentle and natural coagulant. Although it’s not suitable for vegan tofu, it gives soft and mildly tangy tofu with a personal, homemade signature. This method captures the ethos of traditional Ayurvedic nourishment—which aligns beautifully with the holistic philosophy at Claudia’s Concept.
- Texture: Creamy and soft, slightly rustic in appearance
- Taste: Delicately tangy with a rich mouthfeel
- Tradition: Incorporates probiotic-rich residual whey
Collect the run-off liquid when straining homemade curd and use about ½ to ¾ cup per liter of soy milk. Warm the milk before adding, and curdles will begin forming within minutes without any harsh sour notes.
Each coagulant offers a different sensory profile and nutritional nuance. Whether you want your tofu to be a silken dessert, a nourishing soft protein source, or a traditional twist on plant-based goodness—the coagulant is your canvas. Choose your coagulant with your needs and palate in mind, and let your tofu truly speak your language.
Perfecting the First Step: Soaking and Blending Soybeans
Soft tofu starts with one simple, powerful ingredient: high-quality soybeans. What many don’t realise is that how you treat these beans before the curdling process directly shapes the texture, taste, and nutrition of the final product. This prep stage deserves your full attention, and with my method at Claudia’s Concept, you’ll elevate every block of homemade tofu to professional, restaurant-worthy quality.
Timing the Soak Just Right
Your soybeans need to be thoroughly soaked before they’re ready for blending. Soaking isn’t just about softening them—it also activates enzymes that make their nutrients more bioavailable while breaking down compounds that can interfere with digestion. A full 8 to 12-hour soak in clean, filtered water is ideal. If your kitchen is particularly warm, aim closer to 8 hours. In cooler temperatures, let them go the full 12.
After soaking, you’ll notice the beans have doubled in size and their outer skins loosen. Rinse them under cool water and drain well. Don’t skip this step—the rinse removes starch and extra oligosaccharides, which are tough on the gut.
Blending: The Foundation of Silken Texture
Once your beans are fully soaked and rinsed, it’s time to blend. Use a high-power blender (a standard household mixer will do, but may need longer blending time), and combine your soaked soybeans with fresh cold water in a 1:3 ratio. For example, if you’re working with 1 cup of soaked soybeans, blend them with 3 cups of water.
The use of cold water is non-negotiable. It locks in the legumes’ clean, nutty flavour and preserves their enzyme structure, which is key for better coagulation later. Blend until the mixture is completely smooth—this usually takes about 1.5 to 2 minutes in a high-speed blender.
Pro Tips for Silky-Smooth Results
- Cold water only. Never use warm water at this stage—it affects taste and compromises protein structure.
- Use a pulse feature in the initial 10 seconds to break up larger bean pieces before fully blending.
- Adjust water carefully: A 1:3 ratio produces rich, full-bodied soy milk. For extra-silky tofu, increase to 1:3.5. Thinner soy milk yields a more delicate, wobbly tofu.
- Smaller batches work best in home blenders—blend in two goes rather than overloading and underprocessing.
Great tofu begins way before curdling—it starts here, with a simple bowl of soaked soybeans and some mindful blending. Once you get this rhythm down, expect elevated results consistently. At Claudia’s Concept, I always meet clients who think tofu is complicated—but once they master this soak-and-blend step, they unlock a new level of confidence in plant-based cooking. And truly, there’s no going back after that.
Mastering the Heat: How to Cook Soy Milk for Silky Homemade Tofu
Now that your soybeans are soaked, blended, and strained, let’s talk about the crucial role of cooking soy milk. This step doesn’t just prep the liquid—it transforms it. At this point, your kitchen probably smells rich and earthy; that’s the aroma of potential. Think of this moment as the bridge between raw ingredient and delicious, silky soft tofu.
First: Strain with Purpose
Once you’ve blended the soaked soybeans with water until smooth, you’ll need to strain the mixture to separate the soy milk from the pulp, known as okara. Pour the blended mixture through a double layer of muslin or cheesecloth
- Line a large bowl or pot with the cloth
- Slowly pour in the blended soy slurry
- Twist and press the cloth to extract as much liquid as possible
The result? Fresh, creamy soy milk that’s now ready to meet heat. Set the okara aside—it’s fibre-rich and can be used in patties, baking, or smoothies. At Claudia’s Concept, we’re always looking at ways to reduce kitchen waste and maximize nutrition.
Why Cooking Soy Milk Isn’t Optional
This is where many tofu beginners slip up. Raw soy milk contains trypsin inhibitors and oligosaccharides that need deactivation. Cooking the milk not only neutralises these components, but it also prepares the protein structure to properly coagulate during curdling.
The process also eliminates that raw, grassy flavour that soybeans naturally carry. So if you’re after soft, delicate tofu with no overwhelming aftertaste, this step is non-negotiable.
Bring It to a Boil—But Stay Engaged
- Transfer the strained soy milk into a heavy-bottomed pot.
- Set the heat between medium and medium-high, and bring the liquid to a gentle boil.
- Stir frequently using a wooden spoon to prevent thickening at the base or scorching along the sides.
- Continue cooking the milk for 10 to 15 minutes—no less.
Watch for foaming. Soy milk tends to form a protein-rich foam as it heats. You can skim this off with a slotted spoon, or allow it to integrate as it boils. Both methods work, but removing the foam results in smoother tofu.
Science Behind the Simmer
When soy milk heats, its primary proteins—glycinin and β-conglycinin—begin to unfold and interact. The Journal of Agricultural and Food Chemistry explains that this thermal denaturation initiates protein aggregation, allowing for better response to coagulants like magnesium chloride or gypsum in the next phase of tofu-making.
In real terms? That creamy batch of soy milk becomes curd-ready only after proper boiling. No short cuts here.
At Claudia’s Concept, we focus on educating people through experience—feel the texture, follow the aroma, stir with intention. This is where mindful cooking meets science, and the results are always rewarding.
Are your arms tired from stirring yet? Take a breath and smile—your soy milk is now cooked and primed for curdling. Let it cool slightly before moving on. You’re one step closer to beautifully soft, fresh tofu made exactly the way you want it.
Curdling Soy Milk: The Magic Step for Soft Homemade Tofu
Now that your soy milk has been freshly cooked and smells rich and nutty, it’s time for the transformation — curdling. This is the moment when soy milk turns into tofu, and getting it right determines whether you end up with silky, soft clouds or a grainy texture. At Claudia’s Concept, I often say this step is where patience meets precision — and science steps in to reward you with perfect results.
Let the Soy Milk Cool Just Enough
Right after cooking, soy milk can be around 95–98°C — too hot for the coagulant to work effectively. Allow it to cool to a range of 75–80°C. This temperature ensures that the proteins are ready to bind without being shocked by sudden changes. If you have a kitchen thermometer, now’s the time to use it. If not, wait around 5–7 minutes after turning off the heat and look for a gentle steam instead of active bubbling.
Introduce the Coagulant Gradually
Next comes your chosen coagulant — whether you’re using gypsum (calcium sulfate), nigari (magnesium chloride), or lemon juice. Stir the soy milk slowly and gently in a figure-eight motion, then drizzle the coagulant over the surface in small batches, pausing briefly between additions. Remember, this is not the time for vigorous stirring; you want to distribute the coagulant evenly without breaking the forming protein bonds.
- For gypsum: dissolve 1½ teaspoons in ½ cup of warm water first.
- For nigari: use 1 teaspoon in ½ cup of water.
- For lemon juice: freshly squeezed juice works best — around 2 to 3 tablespoons per liter of soy milk.
Let It Rest Undisturbed
Once the coagulant has been added, resist the urge to stir further. Cover the pot with a lid or clean kitchen towel and let it sit undisturbed for 10 to 15 minutes. During this time, magic happens: the proteins in the soy milk bind together and separate from the whey, forming delicate, soft curds. Don’t worry if it looks subtle at first — changes are happening beneath the surface.
Recognize the Signs of Perfect Curdling
How do you know it worked? Here’s what to look for:
- Clear, slightly yellowish whey begins to separate from the curds — a sure sign of effective coagulation.
- The curds are tender and jelly-like, not crumbly or dry.
- You’ll notice a soft, custard-like layer floating in the pot — the foundation of melt-in-your-mouth tofu.
At this stage, you’ve completed one of the most technical aspects of homemade tofu making. These gentle curds are what will become your final soft tofu once they’re scooped, shaped and pressed. If you’ve followed these exact cues, you’re spot on. This is just one more example of how Claudia’s Concept breaks down plant-based cooking into achievable and rewarding steps — with results that speak for themselves.
Ready to shape your tofu into that signature soft block? Let’s move on to pressing and setting — the final touch to bring your tofu home.
Mastering the Art of Pressing and Setting Soft Homemade Tofu
At this stage of your tofu-making journey, you’ve transformed humble soybeans into delicate curds—now comes the crucial process that defines the final texture: pressing and setting. Done gently and precisely, this step determines whether your tofu achieves that smooth, tender, custard-like perfection we aim for at Claudia’s Concept.
Line the Mold: Build a Foundation for Delicate Structure
Start by placing a muslin or cheesecloth over your tofu mold, making sure the fabric extends well beyond the edges. This gives you enough material to fold over the top once the curds are inside. Choose a mold with drainage holes to allow excess water to escape efficiently. At Claudia’s Concept, we always emphasize using breathable natural fabric—it’s gentle on the curds and prevents sticking.
Transfer the Curds: Handle with Intention
Use a slotted spoon to gently ladle the soy curds into the cloth-lined mold. Do not pour in all at once—soft tofu curds are fragile, and sudden pressure can cause them to crumble or compact unevenly. Layer them gradually so they settle with fewer air pockets and a more uniform texture.
Fold and Press: Minimal Pressure, Maximum Control
Once filled, fold the overhanging cloth gently across the top of the curds. Now it’s time to apply light pressure. This is where precision matters. Use a small weight—think around 250 to 500 grams. A bowl filled with water or a small cast-iron pan works well. Let gravity do the work; you’re not aiming to flatten but simply encourage slow water release.
- Press the tofu for 10 to 15 minutes. Avoid exceeding this time if you’re aiming for a silky, soft block.
- Check occasionally—some water should drain, but the tofu should maintain a tender, jiggle-custard consistency.
- The internal structure should remain delicate yet cohesive enough to hold its shape when lifted gently.
In practice, pressing tofu is not just about removing liquid but creating emotional texture—it’s sculpting with patience. The less pressure you apply, the closer you get to that creamy, pillowy softness associated with traditional soft tofu across East and Southeast Asia.
This step perfectly embodies what we celebrate at Claudia’s Concept: mindful preparation that respects each ingredient’s nature. When done right, your tofu won’t just be food—it will be an experience.
Mastering the Texture: Expert Tips & Tricks for Softer, Creamier Homemade Tofu
Texture is everything when it comes to soft tofu. That delicate, almost custard-like consistency doesn’t happen by chance—it’s the result of careful choices at every stage of the process. As a nutritionist and founder of Claudia’s Concept, I always encourage a mindful approach not just to what we eat, but how we prepare it. Let’s dive into the subtle techniques that will give your homemade tofu that luxuriously tender bite.
Control the Coagulant Quantity
Start by using less coagulant than you would for firm tofu. Whether you’re using nigari (magnesium chloride), gypsum (calcium sulfate), or lemon juice, the principle is the same: less coagulant leads to a more delicate protein network. A lower concentration gives curds that are smaller, smoother, and less resistant—exactly what you’re aiming for in soft tofu.
Scientific testing from the Journal of Food Engineering (Vol. 78, Issue 4) shows that decreasing coagulant concentration by up to 50% can reduce tofu hardness by as much as 65%, making it ideal for soft tofu applications like soups or desserts.
Adjust the Water Ratio
Water isn’t just a medium—it’s an ingredient that defines tofu’s body. When you add more water to your soy milk before coagulation, the result is a smoother, lighter texture. This tweak dilutes the protein concentration slightly but enhances the silkiness of your final product.
Think about the end result you want: something spoonable and pillow-soft? Add about 10–15% more water than the ratio used for firm tofu. For instance, if you’re working with 4 cups of soy milk, add an extra half cup of filtered water before introducing your coagulant.
Minimise Pressing Time
If you’ve ever pressed tofu for too long, you’ve probably ended up with something closer to paneer. That’s great for grilling, but not what we want here. To maintain that gentle, silky character, limit your pressing time. Around 10–15 minutes of light pressing is usually sufficient for soft tofu.
Skip the heavy weights. Use a tofu mold with gentle pressure—just enough to hold the curds together without squeezing out all the moisture. Less pressure means more hydration, resulting in that luscious mouthfeel that melts on your tongue.
Use Fine Muslin or Nut Milk Bags
Here’s a texture trick often overlooked: the weave of your cloth matters. A fine muslin or densely woven nut milk bag will both filter and cradle the delicate curds more gently. They retain more moisture and create a creamier finish compared to coarse cheesecloth, which can let some of that silky goodness slip away.
For even better results, pre-wet the muslin cloth before use. This allows the curds to settle more evenly and reduces sticking, which can distort the final shape and texture.
Put It All Together
- Use 40–50% less coagulant than in firm tofu recipes
- Increase water ratio slightly to enhance softness
- Limit pressing to a gentle 10–15 minutes
- Line your mold with ultra-fine muslin or food-grade nut milk bag fabric
Texture is a sensory experience, and with these tips, your tofu will rival anything made professionally. At Claudia’s Concept, we focus on food that heals—inside and out. The gentle textures of soft tofu don’t just make your dishes better; the preparation reconnects you with the art of cooking.
How to Store and Preserve Homemade Soft Tofu for Maximum Freshness
You’ve taken the time to carefully soak, blend, cook, and set your soybeans into that dreamy, pillowy block of soft tofu — well done! Now comes the equally important step: storing it properly. Whether you plan to finish it in a couple of days or stretch its shelf life, the right preservation method makes all the difference.
Refrigeration: The Best Short-Term Storage Solution
To keep your homemade soft tofu at peak quality, always store it submerged in cold, clean water inside an airtight container. This helps maintain its delicate texture and prevents it from absorbing other odors from the fridge. Soft tofu is notably more fragile than its firm counterpart, so handling it gently during storage preserves its smooth, custard-like consistency.
- Use a glass or BPA-free plastic container: These materials won’t leach into the tofu or affect its flavor.
- Submerge completely: The water acts as a moisture barrier, keeping the tofu from drying out or forming a skin.
- Store at 4°C (39°F): This temperature range preserves freshness without freezing the delicate structure.
Change the water daily. Yes, every single day. This simple habit prevents bacterial growth and keeps off-notes at bay. Following this method, your soft tofu will last up to five days with no dip in flavor or quality. I’ve seen clients at Claudia’s Concept extend tofu’s freshness beautifully just by staying consistent with this one daily step.
Freezing Soft Tofu: Yes, But Expect Texture Changes
Can you freeze soft tofu? Yes — but let’s talk science. During freezing, the water inside tofu expands, rupturing the fine network of proteins that give soft tofu its silken feel. The result? A firmer, springier texture once thawed, often more akin to sponge tofu. This isn’t necessarily bad; some enjoy the chewier bite it brings to stir-fries and braises.
To freeze it properly:
- Drain well first: Reducing excess liquid before freezing limits ice crystal formation that can damage the texture.
- Wrap in parchment and place in a freezer-safe bag: This ensures minimal exposure to air and freezer burn.
- Label and date: Use within three months for best results.
Once thawed, press gently to remove any excess moisture, and prepare for a more porous texture that holds marinades exceptionally well. At Claudia’s Concept, we encourage clients to experiment with both fresh and frozen formats — tofu’s versatility truly shines this way.
Want It Fresher Longer? Go Homemade Regularly
Here’s a thought: instead of making massive batches and wrestling with preservation hurdles, why not make smaller, more frequent batches of soft tofu at home? It only takes a few ingredients and minimal prep. Plus, nothing compares to the flavor and refinement of tofu you made just that morning. Batch it smartly — and you’ll always have nourishing plant protein ready to go.
Common Mistakes and Troubleshooting Soft Homemade Tofu
If your soft tofu isn’t turning out the way you hoped, don’t worry — you’re not alone. Even seasoned home cooks run into issues when making tofu from scratch. the process depends on a delicate balance of temperature, timing and technique. Let’s go through the most common pitfalls and how to fix them effectively. These insights come not just from kitchen experience, but from the science of food chemistry — something we pay close attention to at Claudia’s Concept.
Tofu Not Setting Properly?
This usually signals a problem with the coagulant—either the type, the amount, or the temperature at which it’s activated.
- Temperature matters: The soy milk must be between 70°C and 80°C (158°F–176°F) when the coagulant is added. Lower temperatures won’t activate the coagulant fully, while higher ones can destroy its effectiveness.
- Type of coagulant: Magnesium chloride (nigari) and gypsum (calcium sulfate) behave slightly differently. Nigari requires more precision with temperature, while gypsum is more forgiving but slower to set.
- Uneven mixing: Stir gently but thoroughly as you add the coagulant to ensure it distributes evenly—avoid vigorous stirring which prevents curds from setting softly.
Beany or Raw Taste in Final Tofu?
This is a clear sign that the soy milk didn’t cook long enough or at the right intensity. Here’s how to fix that.
- Fully boiling soy milk: Bring freshly blended soy milk to a rolling boil for at least 5–7 minutes. The heat neutralizes the enzymes (like lipoxygenase) responsible for that raw, beany flavor.
- Skim the foam: During boiling, skim off the foam with a fine sieve. Foam traps heat inconsistently and affects even cooking.
- Stir occasionally: Gently stir while cooking to avoid scorching at the bottom—which adds bitterness to the soy milk and alters the end taste.
Tofu Coming Out Too Crumbly?
If your tofu falls apart easily or feels dry, it often has to do with too much coagulant, excessive pressing, or both.
- Adjust coagulant volume: For soft tofu, use roughly 1.5 to 2 teaspoons of coagulant per liter of soy milk. More than that sets firmer curds and yields crumbly textures.
- Pressing time: Limit pressing to 10–15 minutes at most for soft tofu. Use light pressure—just enough to draw out a bit of excess whey without compacting the curds.
- Use a fine cheesecloth: If your cloth is too coarse, it lets smaller curds escape and weakens the structure, causing breakage when unwrapped.
Not Curdling at All?
It’s frustrating when the soy milk remains just that—milk. But the cause is usually simple and solvable.
- Freshness of soybeans: Old or poorly stored soybeans have lost some of their protein content due to oxidation. Use beans no older than 6 months for optimal curd formation.
- Correct water-to-coagulant ratio: If you’ve diluted your coagulant too much, it weakens its setting power. Stick to tested ratios: dissolve 1.5 teaspoons of coagulant in 50 ml of warm water (per liter of soy milk).
- Under-blended soybeans: If the soybeans aren’t blended finely enough, less protein is extracted into the milk. Aim for an ultra-smooth emulsion by blending at least 1 minute at high speed.
Perfecting your homemade tofu takes practice—but once you get a feel for the rhythm, results will be consistently silky and satisfying. And that’s the kind of functional nourishment we celebrate at Claudia’s Concept: food that feels good, functions beautifully, and fits your lifestyle.
Vegan and Gluten-Free Considerations: Why Soft Homemade Tofu Fits Every Plate
When you’re choosing to eat mindfully—whether for ethical, health, or lifestyle reasons—knowing exactly what’s in your food becomes non-negotiable. That’s where homemade soft tofu truly shines. Not only is it an excellent plant-based protein, it’s also completely vegan and gluten-free, as long as it’s made with only soybeans and natural coagulants like lemon juice, vinegar, or food-grade gypsum.
At Claudia’s Concept, I always encourage a clean-label approach. When you make soft tofu at home, you eliminate any risk of additives, preservatives, or hidden thickeners that could compromise your dietary principles. This is tofu in its purest, most nourishing form.
Zero Animal Products, Full Nutrition
Soft tofu is entirely free from animal derivatives. It doesn’t just replace dairy—it redefines how we look at protein-rich foods. Derived from soybeans—members of the legume family—this humble block is rich in complete protein, meaning it contains all nine essential amino acids.
That’s especially crucial for vegans who might otherwise struggle with protein variety. A 2019 review published in Critical Reviews in Food Science and Nutrition confirmed that soy protein isolates and concentrates are among the highest-quality plant proteins, comparable even to animal proteins in digestibility and amino acid profile.
No Gluten, No Guesswork
Gluten-sensitive or celiac? Homemade tofu keeps things crystal clear. Since soybeans are naturally gluten-free, and authentic coagulants are as well, there’s no sneaky wheat protein hiding in your meals. Just be sure the tools and coagulants you use haven’t been cross-contaminated if you’re cooking in a shared kitchen.
This makes tofu a powerful ingredient in gluten-conscious recipes, from Asian stir-fries to Indian curries—and that brings us to versatility.
Swap It In, Serve It Up
Soft tofu beautifully steps in for paneer in Indian dishes. It blends seamlessly into gravies, absorbs spices like a sponge, and remains tender on the palate. Swap it in your makhani, palak, or bhurji recipes—it holds its own every single time.
In Western cuisine, it’s just as effective. Try scrambling it with turmeric, nutritional yeast, and sautéed veggies for a protein-packed start to your morning. There’s zero cholesterol, minimal saturated fat, and full-bodied flavor when you season it right. That’s why I include tofu as a staple in many of the customised plans I design at Claudia’s Concept—maximum flexibility with uncompromised nutrition.
What’s your favorite way to use soft tofu? Have you tried it yet in a traditional family recipe? Explore its culinary potential—it’s waiting to surprise you.
Homemade Soft Tofu: A Creamy Essential in Every Plant-Based Kitchen
Once you’ve mastered the simple alchemy of transforming soaked soybeans into soft, pillowy tofu, it slowly becomes more than just an ingredient — it becomes a canvas. Whether you’re craving a silky base for your miso soup, a light filling for Indian parathas, or a protein-rich swap for dairy in your smoothie bowls, soft homemade tofu will always rise to the occasion.
What I especially love about homemade tofu — and what we celebrate often in Claudia’s Concept — is the control it gives you. From curdling technique to pressing time and even the mineral content through coagulant choice, you’re in charge. Want a fluffier bite? Simply reduce pressure when pressing. Craving a subtle tang? Try experimenting with lemon juice as your coagulant. The possibilities unfold beautifully when you play with method and ingredient ratios.
Soft tofu easily absorbs the flavors of spices, herbs, and aromatics. Stir it into a kadai masala for a fragrant veg-tofu curry, or blend it with garlic, lime, and coriander for a creamy spread with a kick. In my Indian-fusion workshops at Claudia’s Concept, we often stir this homemade tofu into rich palak bases or crumble it over vegan biryani like a plant-based paneer — and the feedback is always fantastic.
As a plant-based protein, soft tofu delivers approximately 8–10 grams of protein per 100 grams, depending on how it’s processed. That’s a meaningful contribution to your daily intake, especially in dairy-free, vegetarian, or vegan diets. Alongside protein, you’re getting a hit of iron, calcium (if you’re using calcium sulfate as your coagulant), and isoflavones — compounds linked to hormonal balance and heart wellness. Several controlled trials — like the one published in the Journal of Clinical Endocrinology & Metabolism — show that regularly including soy-based foods can help reduce LDL cholesterol and support cardiovascular health.
The journey doesn’t end at tofu blocks. What about using your soft tofu in vegan cheesecakes, as a base for creamy salad dressings, or whipped into a decadent chocolate mousse? This isn’t just a recipe. It’s the beginning of new flavor stories in your kitchen.
Ready to make your own soft tofu? Try the recipe — then experiment, get creative, and use it as a springboard for exploring new plant-based dishes. Share your favoriteflavor combos or tofu creations in the comments below. And if you haven’t already, subscribe to Claudia’s Concept for more vegan, sustainable, and delicious inspiration straight from the studio to your inbox.